
Deployment of Talos OS
Now I know that for deploying Kubernetes clusters, there are many options available, there’s applications like kind, microk8s, minikube, k3s, kubeadm, and managed services like EKS, GKE, and AKS that make it easy to get started.
I’ve had experience with some of these tools, and I believe there’s always a problem: You have to either pay for maintenance (That’s like the idea of managed-services) or maintain things yourself (Run things for yourself, mantain dependencies and so on), so as I wanted to experiment I didn’t really care about maintaining things for myself, but I wanted it to be simple. Now, the applications that I mentioned before intended to run Kubernetes are well: applications. I don’t want to use the OSI model here to explain what i mean, but just know that when running applications you have to consider a lot more than just the application you’re trying to execute (Dependencies, Connectivity and a lot of other things). This was a problem to me because I wasn’t willing to do all that maintenance work instead of dedicating that time to Kubernetes, so after some research I found out there was an option named Talos OS that was exactly what I was looking for, an OS meant to just run Kubernetes.
Now, you might be wondering:
Didn’t you have like other options?
Of course I had, just as an example there’s RancherOS, Flatcar Linux and Fedora CoreOS. But I chose Talos OS mainly because it’s meant to only run Kubernetes and it also has other features that I found great for solving my problem. I’m not saying that the other OSes aren’t great, but for my use case Talos was probably the best fit.
Should I spend time explaining what Talos OS is?
Maybe a little bit.
So, to make it simple: Let’s say that Talos OS is a minimal and immutable operating system designed specifically for running Kubernetes. It is designed to provide an efficient platform for deploying and managing Kubernetes clusters/workloads. Some of its key features include:
Minimalism: Talos OS is stripped down to the essentials needed to run Kubernetes, reducing the attack surface and resource consumption.
Immutability: The OS is designed to be immutable, meaning that it cannot be modified after deployment. This helps ensure consistency and reliability across cluster nodes.
API-Driven: Talos OS is managed entirely through an API, allowing for automated and programmatic (Also CLI-driven) control over the operating system and Kubernetes cluster.
Now, you might be wondering ok this is great but please define what do you mean by essentials? Look no further, I’ve got an answer for you. When I say “essentials”, I mean that Talos OS includes only the components necessary to run Kubernetes, such as the container runtime, networking stack, and basic system utilities. It does not include unnecessary packages or services that are not required for Kubernetes operation like package managers. When I did my experiment counting the number of files inside the /bin directory gave me a total of 38 files, which is pretty minimal compared to other operating systems. Now you might be thinking Ok, you mentioned there’s no packages that aren’t needed to run Kubernetes and I think that means there’s no shell, so, how in the blue blazes did you count the number of files inside /bin? Good question, I did that by actually counting the files that a Talos VM had on its disk: I mounted the disk on another Linux machine (That had the neccessary tools) and counted the files from there since Talos OS doesn’t have a shell.
The same goes for immutability. In the context of Operative Systems, eventough immutability has a lot of interpretations, it basically means that the OS is designed to not be modified after deployment. In Talos’ case, this means that the base operating system can’t be modified, but there’s some layers on top that in fact can (But not for everything). For example, you can modify the Kubernetes configuration, some network settings, and some other parameters through the Talos API, but you cannot modify the underlying OS components.
Great, so now that we know what Talos OS is (At least a bit), let’s proceed to the deployment steps. You should know there’s a lot of ways to deploy Talos OS: you can use bare-metal servers, containers, virtual machines, cloud providers … . For this tutorial, I’ll be using virtual machines with QEMU and KVM as the hypervisor. Why? Because it’s free and open-source, and I can run it on my Linux machine without any problem. Why not containers then? I did that but I really think that using VMs gives you a more realistic experience of running Talos OS, plus, it allows you to experiment with different configurations and settings that might not be possible in a containerized environment. Can I use other hypervisors like VirtualBox, VMware, Hyper-V … ? Yes, you can. The steps will be similar, but the commands and configurations might differ slightly depending on the hypervisor you choose. Why not cloud providers? I want to have the ability to interact with the platform running my OS to show certain things. Can I combine multiple deployment mechanisms together? Yes but not because of Talos, that’s because of Kubernetes. As long as you can connect nodes and that kind of stuff you can create a cluster of nodes. So, what I’m trying to say is Talos doesn’t provide any functionalities specific to this (Or at least I haven’t found any references to it).
Ok, enough talking. Let’s get our hands dirty and deploy Talos OS!
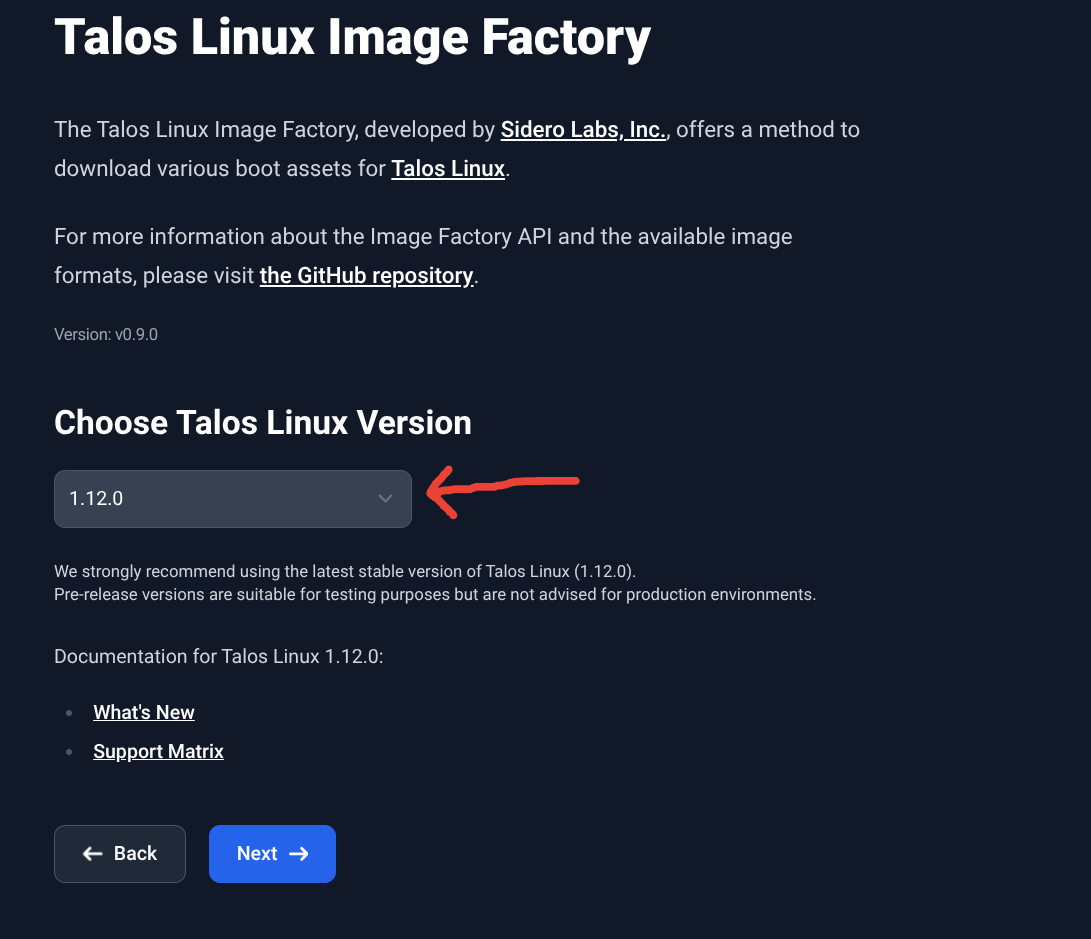
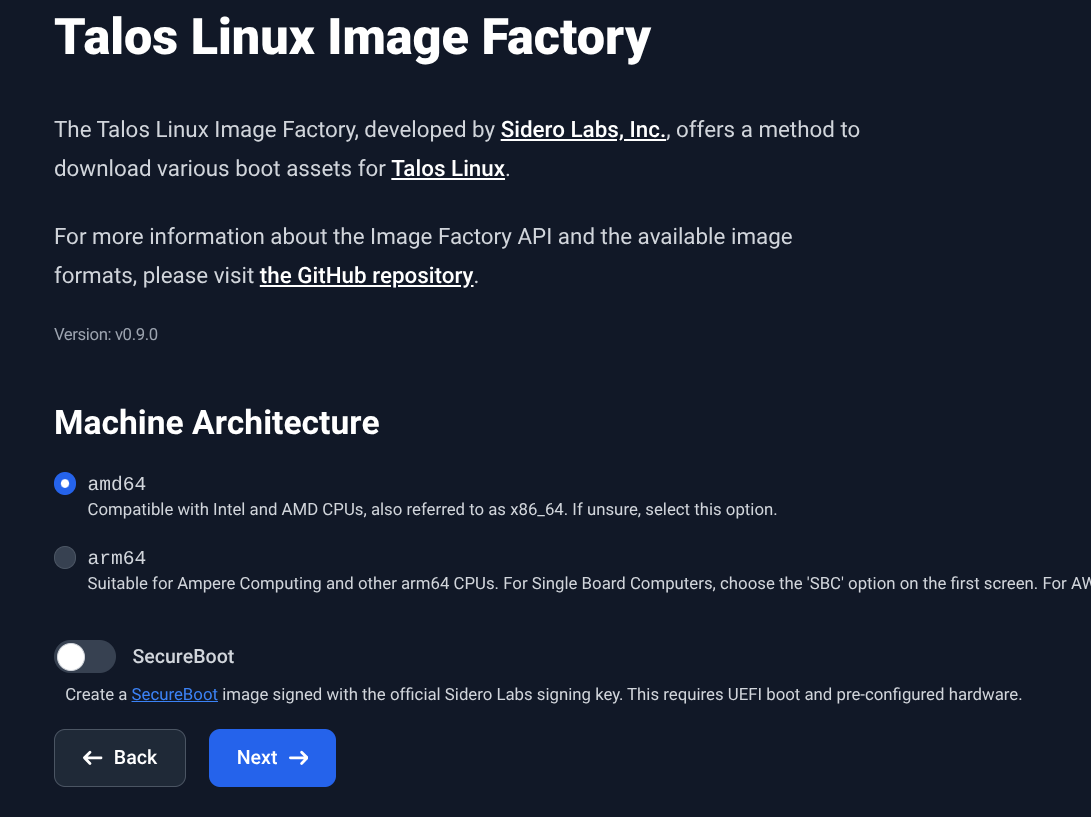
Download Talos OS ISO image from the image factory website: Here you select the hardware where you want to deploy Talos OS, in our case we will select
Bare-metalas the hardware target. choose the latest available version (As of writing this tutorial, the latest version isv1.12.0), then select the architecture of the target machine (Most likelyamd64for x86_64 machines). Finally, click on theDownloadbutton to download the ISO image.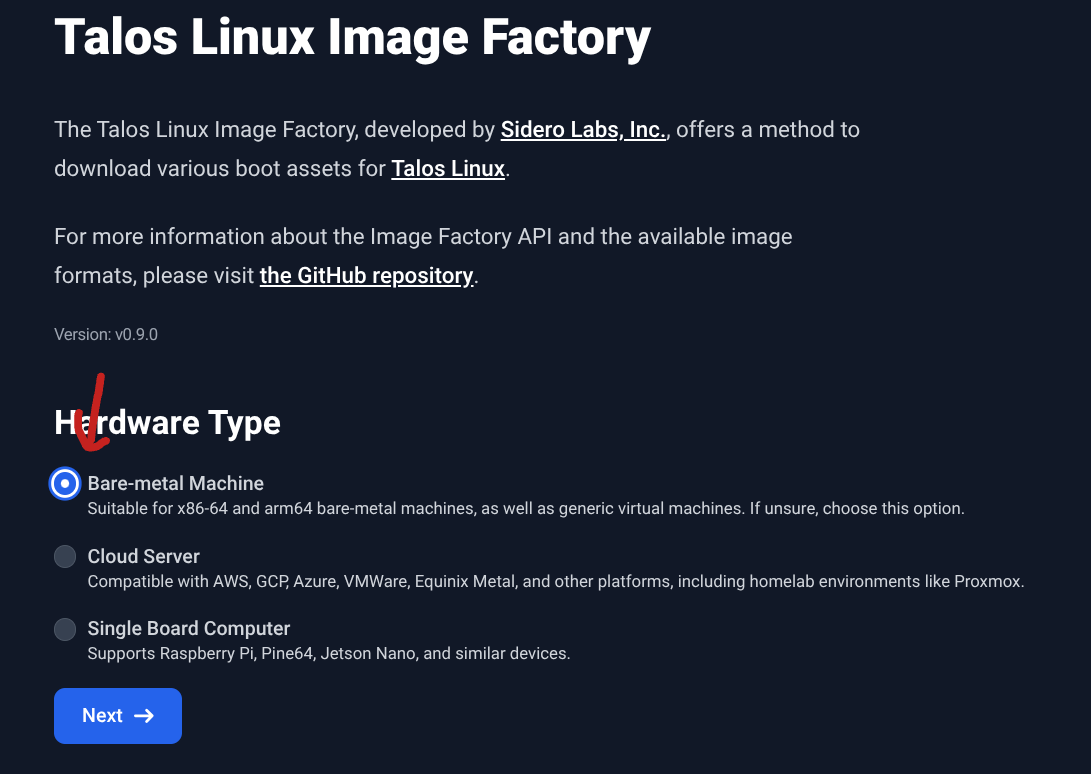
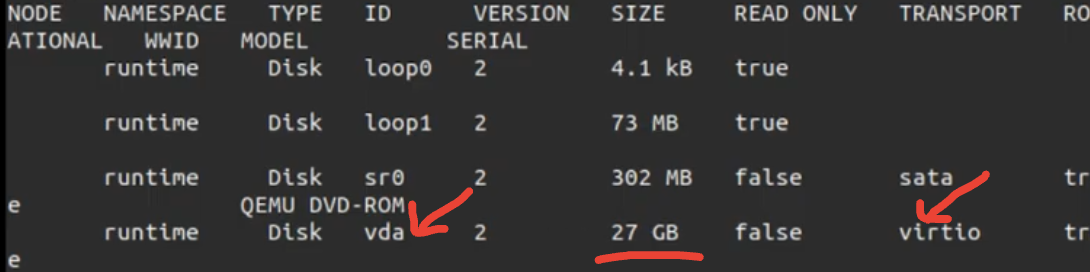
Create virtual machines for the control plane and worker nodes. For this tutorial, we will create one control plane node and one worker node. You can use Virt-Manager in case you want a UI experience, i like the terminal so use the following commands to create the VMs using QEMU/KVM:
| |
- Generate Talos OS configuration files for the control plane and worker nodes using the
talosctlcommand-line tool and apply them. You can use the following commands to generate and apply the configuration files:
| |
- Bootstrap ETCD (Only for the first control plane node and one time):
| |
![]()
- After some time (Bootstraping can take a while), you should be able to access the Kubernetes cluster using
kubectl. To do this, you need to get the kubeconfig file from the control plane node and set it up on your local machine:
| |

Yep, I ommited some really cool details like System extensions (Talos’ way of installing additional software on the nodes), A/B upgrades, Partitions, Talos’s way of running software and other cool stuff, but this is just a basic tutorial to get you started with Talos OS. You can find more information about these topics in the official Talos OS documentation. And also I would like to invite you to explore more about Talos OS and its features, as it has a lot to offer for running Kubernetes clusters efficiently and securely.
Was this tutorial helpful? Do you have any questions or suggestions? Feel free to leave a comment. Happy clustering!